

Click the link to download the Plane Balance Project jar file PlaneBalanceProject.jar Then double click the file PlaneBalanceProject.jar to launch the program.
When launching the application you will see the GUI displayed like the image below.
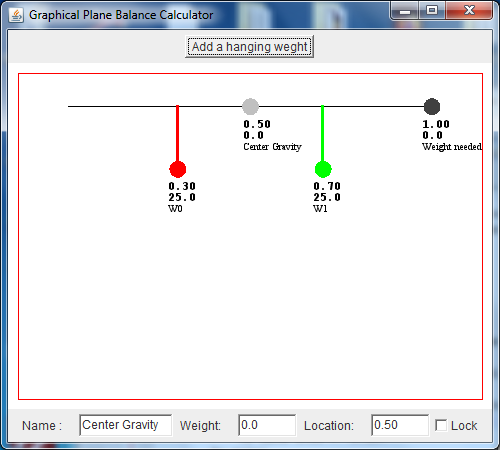
To familiarize yourself with this tool, follow the example below.
<enter> means to press the enter key.
You could also press the tab key.
Follow the steps below
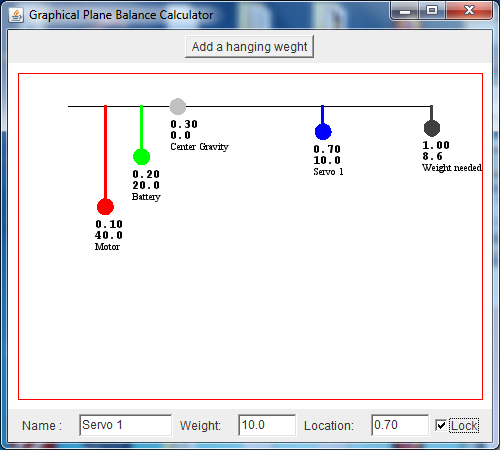
  Click the red circle
        Enter
            Name     :  Motor <enter>
            Weight   :  40    <enter>
            Location :  0.1   <enter>
            Click Lock
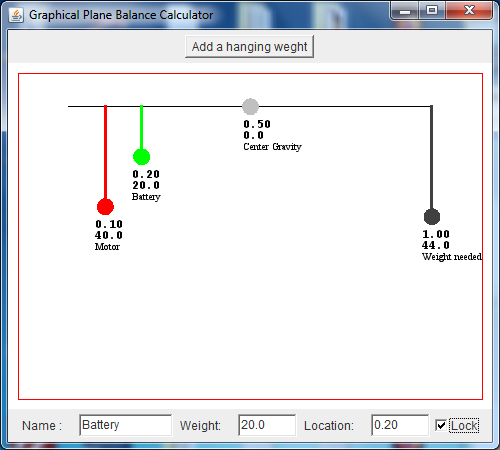
  Click the green circle
        Enter
            Name     :  Battery <enter>
            Weight   :  20      <enter>
            Location :  0.2     <enter>
            Click Lock

    Notice with this setup, 44 grams are needed at the tail to balance the model.
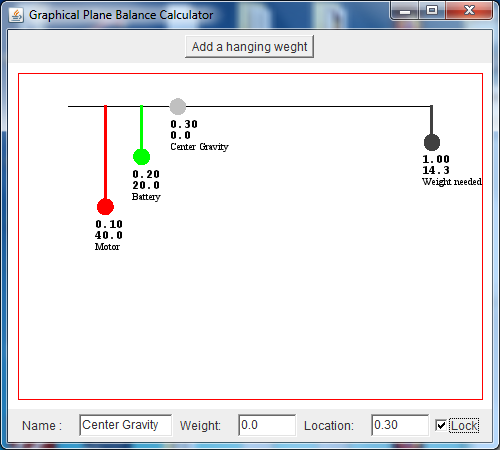
  Click and Drag the Gray circle to the left of the red circle.

    Notice the Weight needed needs to be added at the front of the plane.

    The name field should display "Center Gravity."  If not, click the gray circle.

        Enter
            Location :  0.3  <enter>
            Click Lock
  Click the button "Add a hanging weight"

    Notice the weight added in color blue.
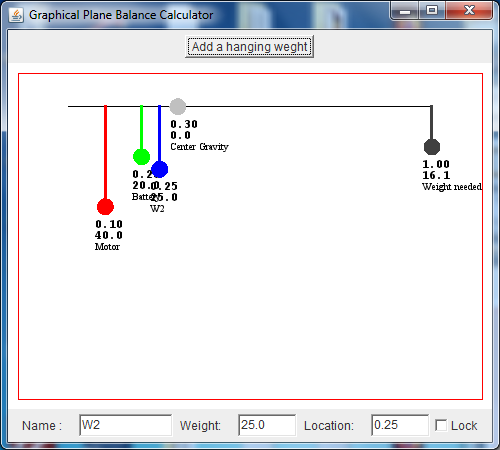
  Click the Blue circle

    Notice the name field displays "W2" for the third weight.
        Enter
            Name     :  Servo 1 <enter>
            Weight   :  10   <enter>
            Location :  0.7  <enter>
            Click Lock
  Click the button "Add a hanging weight"

    Notice the weight added in color blue, indicating W3
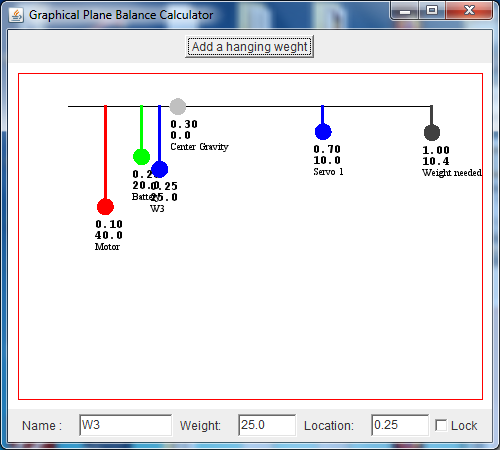
  Click the Blue circle

    The name field displays "W3" for the fourth weight.
        Enter
            Name     :  Servo 2 <enter>
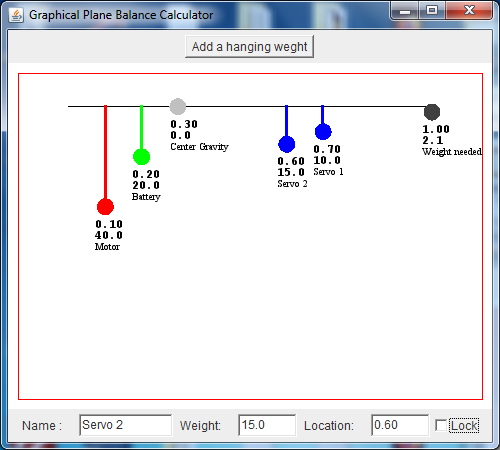
  Drag the Blue "Servo 2" circle to the right
  between the circles "Center Gravity" and "Servo 1"

  Also and adjust the length and notice the weight changes.
  Now you can position servo 2 such that no
  weight will be needed to balance the plane.

  You can also see the results if a heaver servo is used
  Here we see the results.
  Notice Servo 2 is a heaver servo.
  If the weights are entered in Grams, we need 2.1 grams
  added at the tail to balance the plane,
  with Servo 1 mounted 70% back and Servo 2 mounted 60% back
  from the front of the plane.
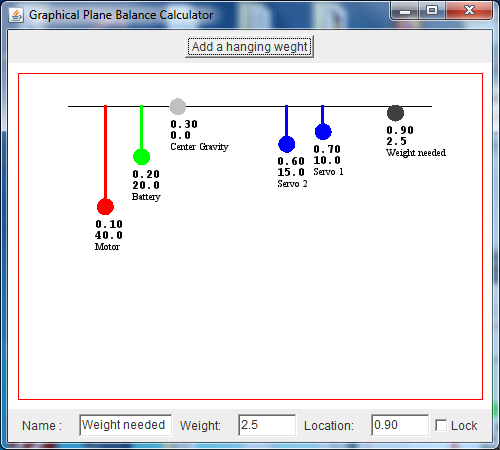
  Now click and drag the Weight Needed to Location 0.90
  The weights needed at this location is 2.5 grams.
Plane Balance limits

    Enter a Weight :  max is 100
    When Dragging  :  max is 100

    Lock - when checked, prevents moving the item using the mouse.

    When entering data in the fields you need to press the enter key
    or the tab key for the data to be registered and updated.

    When adding an item, the following defaults as used,
        Name     :  W# where # represents the next item
        Weight   :  25.0
        Position :  0.25

    The position is based on a percentage.
    0.0 is the front and 1.0 would be the tail

    To determine the location in % for your plane, two values are needed
        1.  Length of plane
        2.  Position of item back from the propeller.

        For example, a plane 20" long, with the battery weighing 20 grams
        positioned 3" behind the propeller,
            we have 3/20 =  0.15.
        So enter
            Name     :  Battery<enter>
            Weight   :  20<enter>
            Location :  0.15<enter>
If you would like to provide feedback, I can be reached by filling out this Contact Form